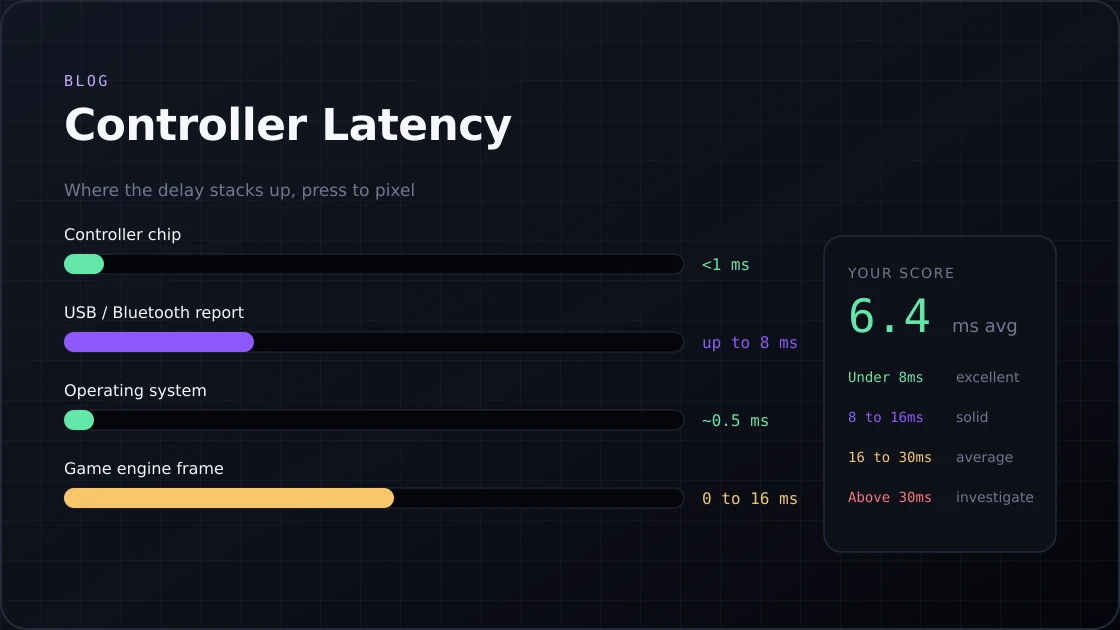
Controller Latency Tester: Check Your Input Lags for Free
Test your controller's input lag and response time in seconds with our free controller latency tester. Works for PS5, PS4, Xbox, and PC.
11 min · August 6, 2026
Test your controller's gyro sensor online. Check pitch, yaw & roll on PS5, Switch & more. Spot gyro drift in seconds. No download required.
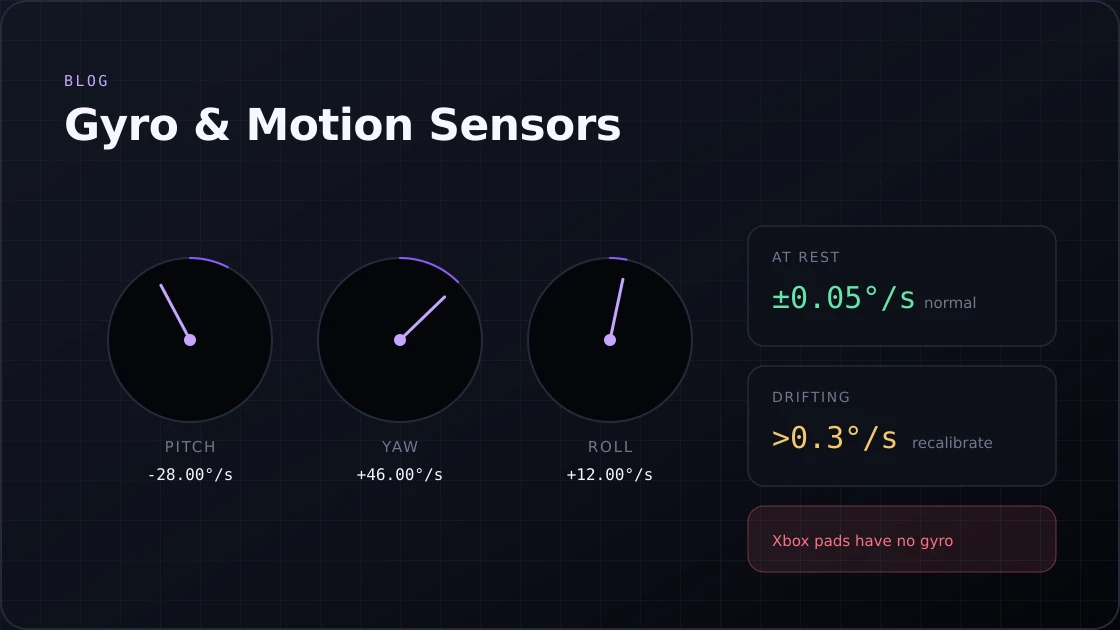
Your controller has a gyroscope inside it. The gyroscope measures angular velocity: how fast you're rotating the controller around each axis. Most people never test it until something goes wrong. If your camera drifts on its own in a shooter, your aim feels shaky during motion controls, or gyro aiming just seems off, the sensor is usually the first thing to check — right after you have confirmed the basics with a gamepad tester.
This online controller tester reads live gyro and accelerometer data directly from your gamepad. No download or app required. You get real pitch, yaw, and roll values in real time, plus shake detection, calibration tools, and a full motion history graph. It works with PS5 DualSense, PS4 DualShock 4, Nintendo Switch Pro Controller, and Joy-Cons through any Chromium browser.
The tool reads your controller's IMU output and splits it into three live data streams at once.
Motion support depends entirely on the hardware inside the controller. There is no software fix for a controller with no IMU chip.
| Controller | Gyro | Accelerometer | Axes | Best Connection |
|---|---|---|---|---|
| PS5 DualSense | Yes | Yes | 6-axis | USB or Bluetooth |
| PS4 DualShock 4 | Yes | Yes | 6-axis | USB recommended |
| Switch Pro Controller | Yes | Yes | 6-axis | USB or Bluetooth |
| Joy-Con (L and R) | Yes | Yes | 6-axis | Paired via Bluetooth |
| Xbox Series X/S | No | No | None | Not applicable |
| Xbox One / Elite Series 2 | No | No | None | Not applicable |
| 8BitDo Ultimate 2 | Yes | Yes | 6-axis | Switch mode only |
| Steam Deck | Yes | Yes | 6-axis | Device mode |
| Logitech F710 | No | No | None | Not applicable |
Xbox controllers across every model and generation have no gyroscope or accelerometer hardware. This is not a driver issue or a connection issue. The hardware simply does not exist inside them. Running the Xbox controller tester will confirm the device is connected, but motion data will never appear.
Plug in via USB or pair over Bluetooth. USB is more stable for gyro testing, especially with PS4 and PS5 controllers. Bluetooth works for Switch controllers without much trouble.
Use Chrome, Edge, or Opera. Chrome gives the most complete Gamepad API support. Firefox and Safari have limited gyro access for gamepads because they do not support WebHID.
Press any button after connecting. The Gamepad API does not register a device until it receives at least one input signal. The controller name and connection type will appear once the browser detects them.
Some browsers prompt for motion sensor access, especially on HTTPS pages. Accept it. Without permission, the sensor panel stays inactive, and you will see no live data.
Pick up the controller and move it slowly. Pitch, yaw, and roll values should respond immediately. Rotate it on each axis one at a time to see which values change and by how much.
Set the controller flat on a hard, still surface. All three gyro values should settle close to 0.00°/s. If they keep moving on their own, you have gyro drift.
Click the Calibrate button while the controller is completely still. This sets a new zero-point baseline. Wait 5 to 10 seconds after setting it down before you hit calibrate. Rushing this step causes the sensor to pick up residual movement and calibrate to the wrong zero point.
Pick up the controller and shake it firmly. The shake counter should increment, and the accelerometer values should spike. This confirms the accelerometer responds to fast movement and not just slow tilts.
Every motion-capable gamepad uses an IMU chip. IMU stands for Inertial Measurement Unit. It is a small silicon module, usually a MEMS (Micro-Electromechanical Systems) chip, that combines the gyroscope and accelerometer on one board.
The gyroscope uses microscopic vibrating structures. When you rotate the controller, the Coriolis effect shifts those vibrations. The chip reads that shift and converts it into an angular velocity value. That is the number you see in the tester.
The accelerometer tracks linear force and the constant pull of gravity at 9.8 m/s². At rest, it always reads approximately 1.0G pointing downward. That gravity reading is actually useful because the firmware uses it as a reference point to correct the gyroscope.
The PS5 DualSense IMU polls at up to 1000Hz internally. Standard analog sticks report at 125Hz. That difference is why gyro aiming can feel more responsive than stick aiming when everything is calibrated correctly.
Gyro drift is the most common issue users find during game controller testing. It shows up as slow, unintended sensor movement while the controller sits completely still on a surface.
Software/calibration drift:
Hardware drift:
Place the controller flat on a firm, non-vibrating surface. Watch the gyro panel for 20 to 30 seconds without touching it.
If you are also seeing the analog sticks move without input during this same test, that is a separate problem. Diagnose the stick issues independently of the gyro problems.
Online calibration through this tool handles most drift issues. System-level calibration goes deeper when the online fix does not hold.
PS5: Go to Settings, then Accessories, then Controllers. Select Calibrate Motion Sensors. Follow the on-screen steps and place the controller flat when the screen tells you to.
PS4: Go to Settings, then Devices, then Controllers. Select Reset Calibration. This clears the stored zero-point data and starts fresh.
Nintendo Switch: Open System Settings and go to Controllers and Sensors. Select Calibrate Motion Controls. The system walks you through placing the controller in specific positions, so follow each one exactly.
PC via Steam: Open Big Picture mode, go to Controller Settings, and select your controller. Run the Calibrate option. Also enable "Gyro Calibration on Rest" so Steam auto-recalibrates whenever you set the controller down for a few seconds during a session.
Steam Deck: Go to Settings > Controller > Gyro Calibration. Set the Deck completely flat on a table before starting the calibration routine.
Browser choice matters more for gyro tests than for basic button or deadzone checks. The reason is WebHID.
PS4 and PS5 controllers default to power-saving mode on PC. In this mode they only send basic button data. WebHID sends a Feature Report that unlocks full sensor output, including live gyro and accelerometer readings. Chrome and Edge support WebHID. Firefox and Safari do not.
| Browser | Gamepad API | WebHID | DeviceOrientation |
|---|---|---|---|
| Chrome 89+ | Yes | Yes | Yes (HTTPS required) |
| Edge 89+ | Yes | Yes | Yes (HTTPS required) |
| Opera 75+ | Yes | Yes | Yes (HTTPS required) |
| Firefox | Yes | No | Yes (HTTPS required) |
| Safari | Yes | No | iOS 13+ with permission |
If you are on Firefox and Gyro shows nothing for your PS controller, this is the exact reason. Switching to Chrome fixes it in most cases. Basic tests like the button tester work fine in Firefox since those only use the standard Gamepad API.
The accelerometer test runs alongside the gyro check. They share the same IMU chip but measure different things. The gyro measures rotation speed, and the accelerometer measures force and movement.
The shake counter goes up each time the sensor detects a sharp force spike above the threshold you set.
This test is useful after a controller has been dropped. If the count never increases no matter how hard you shake the controller, the accelerometer may not be reporting data at all, and the IMU may need to be looked at.
| Reading | What It Means |
|---|---|
| ~1.0G at rest | Normal, that is gravity |
| 0.0G at rest | Accelerometer likely not reporting |
| Above 2.0G at rest | Probable sensor error |
| Peaks during shake below 2G | Low sensitivity or possible dead zone |
The numbers in the tester connect directly to how motion controls feel in actual games. Here is how to read them in context.
The most effective approach is not gyro alone. The stick handles large movements, and the gyro handles the fine-tuning.
Flick Stick maps the right stick to absolute facing direction and uses the gyro for all horizontal aiming. When you flick the stick, the yaw axis in the Motion History Graph shows a sharp spike. After that spike settles, only small gyro adjustments should appear. If your yaw keeps drifting after the flick movement ends, calibration is needed before Flick Stick becomes usable at any competitive level.
These titles support gyro without needing Steam Input or third-party tools.
| Game | Platform | How to Enable |
|---|---|---|
| Splatoon 3 | Switch | On by default in settings |
| Zelda: Tears of the Kingdom | Switch | On by default, used for aim and puzzles |
| Fortnite | PS5, PS4, Switch, PC | Touch and Motion tab in settings |
| Apex Legends | PS5, PS4, Switch | Controller settings menu |
| Resident Evil 4 Remake | PS5, PS4, PC | Accessibility settings |
| DOOM Eternal | PC | Steam Input configuration required |
| Horizon Forbidden West | PS5, PC | Accessibility options |
| The Last of Us Part II Remastered | PS5 | Motion Sensor aim in gameplay settings |
Steam Input lets you map gyro to mouse movement for any game in your library, even if the game itself does not support it.
This works with DualSense, DualShock 4, Switch Pro, and Joy-Cons. It does not work with Xbox controllers because there is no gyro hardware to map.
If the tester shows zeroes or the sensor panel stays inactive, work through these checks in order.
Small setup habits make a noticeable difference in how consistent the gyro feels session to session.
Yes. It runs entirely in the browser. Chrome gives the most complete results for controller gyro specifically because it supports WebHID, which unlocks full sensor data from PS controllers.
PS controllers default to power-saving mode on PC and only send basic button data in that state. Without WebHID. Switch to Chrome or Edge and connect via USB for complete gyro access.
Yes. Switch to Device mode to test your phone or tablet's built-in motion sensors. The tool reads alpha, beta, and gamma values through the DeviceOrientation API, so you get the same live data layout as controller mode.
All three axes should read close to 0.00°/s when the controller is sitting still on a flat surface. Fluctuation up to ±0.05 is within the normal range.
Stick drift is mechanical. Gyro drift is a software calibration error in the sensor's zero-rate offset, often caused by temperature changes. Gyro drift is almost always fixed through recalibration.
No. All Xbox controllers, including the Elite Series 2 and Xbox Series X controllers, have no gyroscope or accelerometer hardware.
Nintendo's Switch firmware applies sensor fusion and smoothing before data reaches games. On PC, the raw IMU output comes through with less processing, which makes sensor noise more visible.
A firmware update occasionally resolves it, particularly on PS5 controllers that received sensor-related patches. Power cycling the controller can also reset the zero-rate offset temporarily.
Test your controller's input lag and response time in seconds with our free controller latency tester. Works for PS5, PS4, Xbox, and PC.
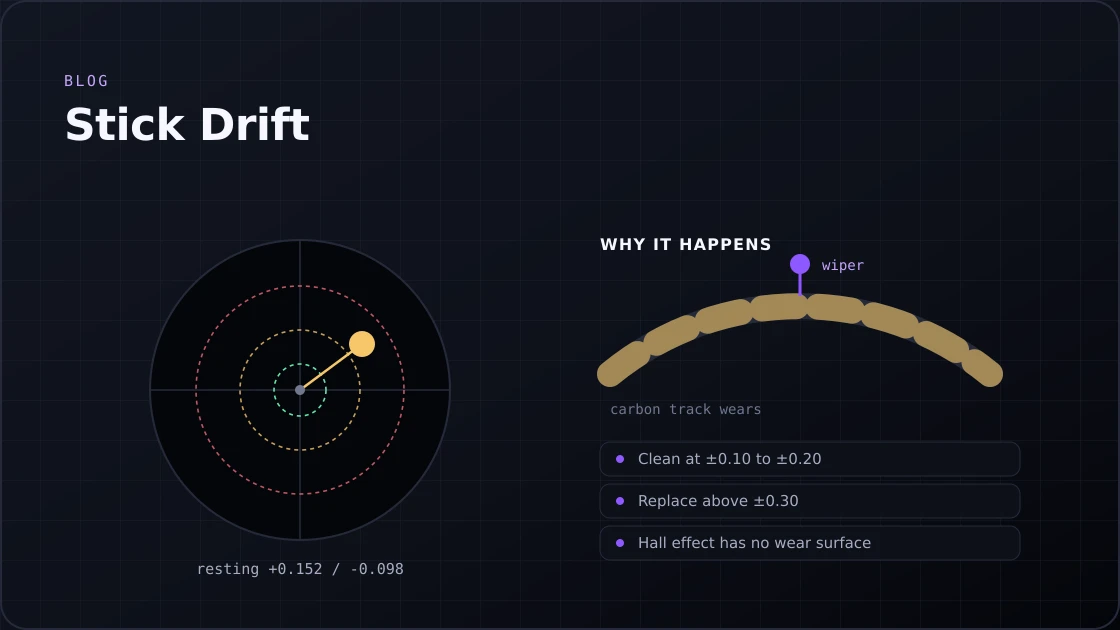
Got stick drift on PS5, Xbox, or Switch 2? Test your controller, identify the causes, and fix it for good with these proven steps.
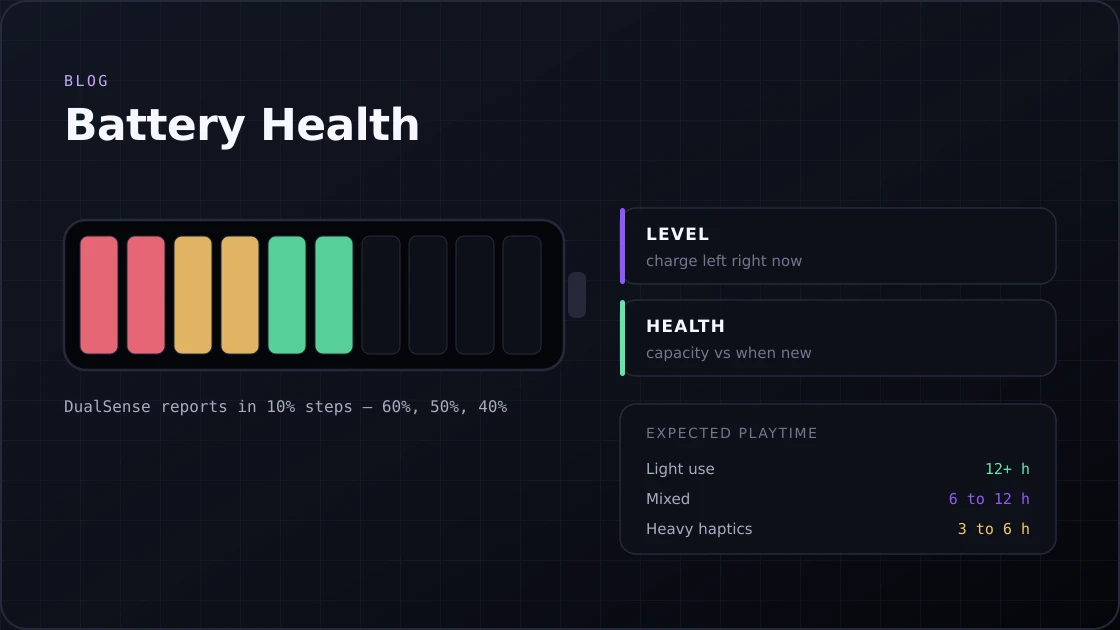
Not sure how to check PS5 controller battery health or Xbox battery level? Follow this guide to monitor, fix, and extend your controller battery life.
Or go back to the gamepad tester and read your controller's live values.